Documenting With MediaWiki
Reading Time: 6 minutes | Published: 2020-06-04 | Last Edited: 2024-10-18
Much to my chagrin, I’ve hardly posted anything at all the past couple of weeks. This is partly due to university summer classes starting and partly due to me putting some work into NixNet’s documentation. After listening to Episode 4 of 2.5 Admins, I decided to change some things up with my infrastructure planning and, instead of automating all the things, document it first. Only after writing extensive documentation will I look into automating portions my setup, like hardening a server directly following installation. To that end, I’ve decided to use MediaWiki.
After downloading and installing MediaWiki, a very straightforward process,1 the next step is configuring it. There is of course a guide but I think it can be useful to see someone else’s configuration to get ideas from as well, especially considering how many extensions there are. I won’t go through all of the settings, just the maybe less obvious ones.
URLs 
The first thing in LocalSettings.php is $wgScriptPath. Different wikis take vastly different approaches for this. Some fill that variable with "/w" (default), some with "/view", and some with something entirely different. Wikipedia and all of its children use "/wiki". While well and good, the default configuration will have your URLs appearing as example.com/wiki/index.php?title=<page> and this is bad practise for SEO; if you want your pages easily discoverable, the URLs need to be a bit shorter. The easiest way I’ve found to do this is add all of six lines to my NGINX config and set $wgScriptPath to "" (an empty string).
location / {
    try_files $uri $uri/ @rewrite;
}
location @rewrite {
    rewrite ^/(.*)$ /index.php?title=$1&$args;
}
The snippet above tells NGINX to rewrite all of your site’s base URLs
and remove index.php?title= from them. This is a similar approach to
what Mozilla has done. The result
is cleaner URLs that comply with SEO best practises and a setup that
avoids moving MediaWiki to the site’s
root.
Mobile view 
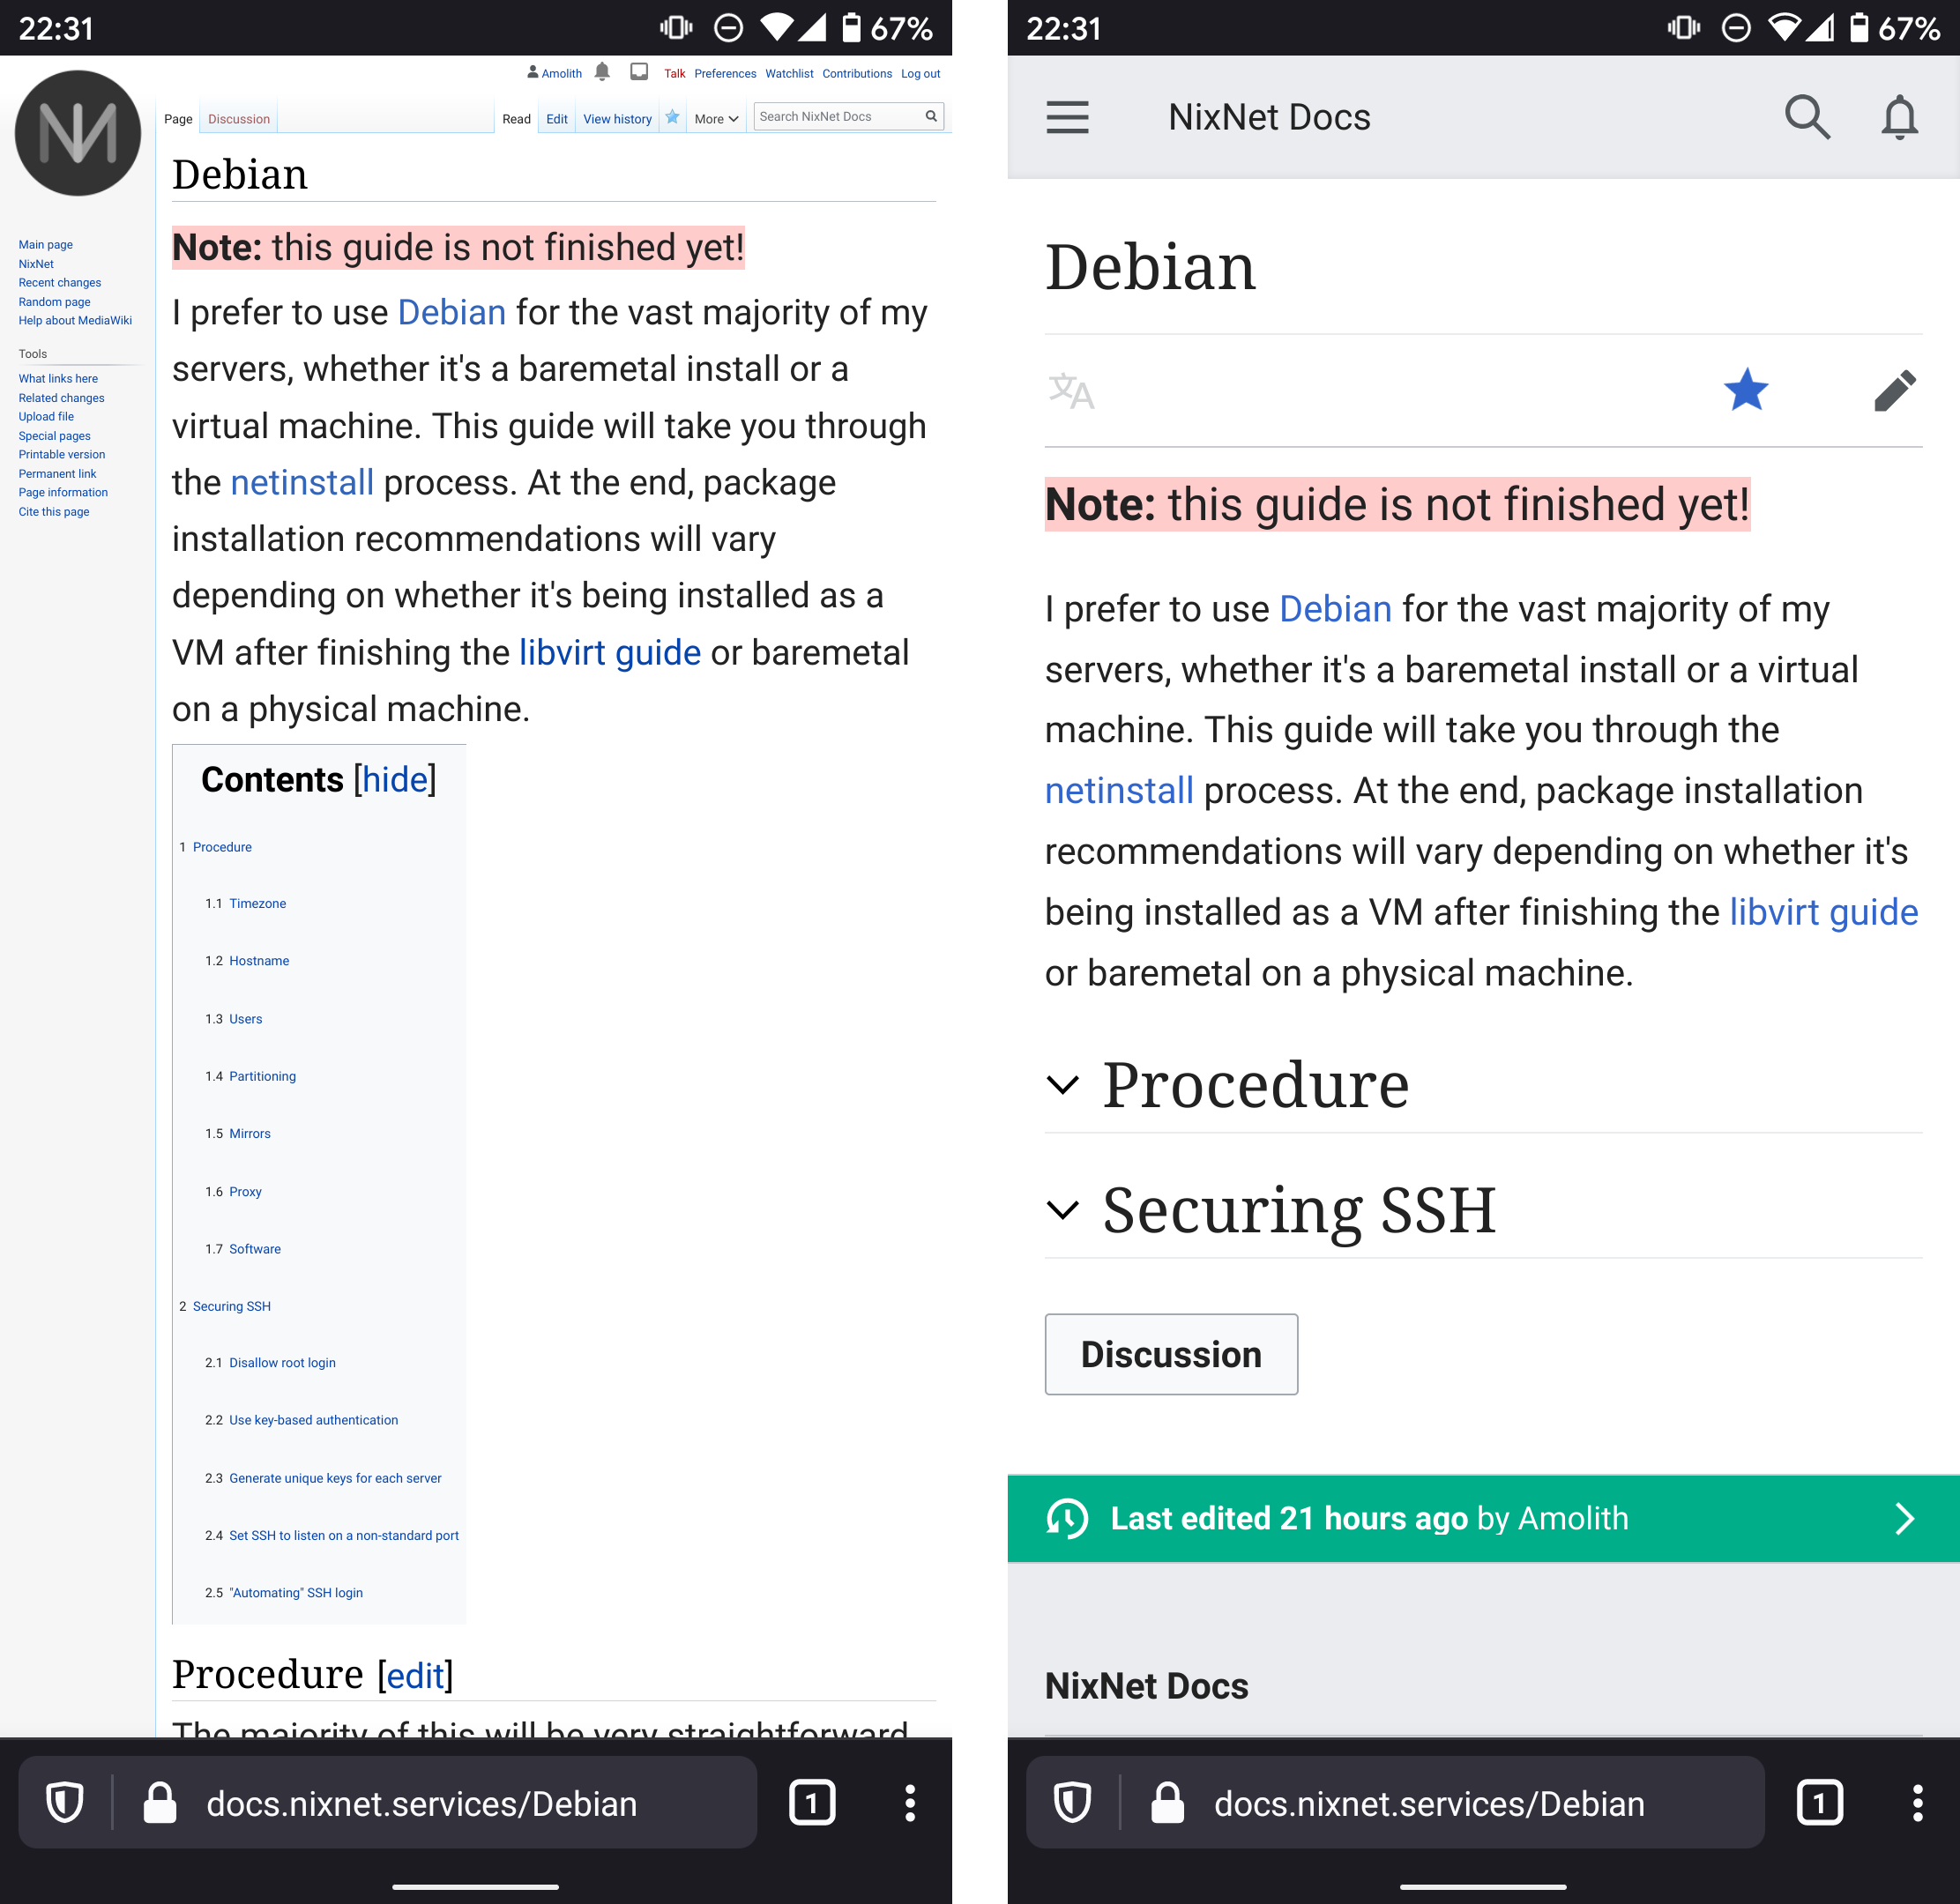
I see a lot of MediaWiki instances without a good mobile version and, other than keeping the number of extensions down, I don’t really understand why. Setting it up is incredibly easy and gives everyone a much better experience. The Minerva Neue skin is designed specifically for use on mobile devices and is also much more aggressive about optimisation. Though editing is a terrible experience, it also looks great on desktop. The MobileFrontend extension is used to detect the reader’s device and serve them either the configured desktop skin or Minerva Neue. You could serve a different skin on mobile but I’ve found that Minerva Neue looks the best by far.
To set them up, you’ll need to download the skin and the extension. From there, you’ll need to add a few lines to your config file. On a side note, I love how dynamic MediaWiki can be, especially with downloads; providing a copy/paste extraction command that doesn’t use wildcards and puts it in the correct directory is awesome.
# I recommend putting this with the rest of your extensions
wfLoadExtension( 'MobileFrontend' );

# These can go wherever you want but together is better
$wgMFDefaultSkinClass = 'SkinMinerva';
$wgMFAutodetectMobileView = true;
With the skin and extension in place and those lines in your config,
save and reload and there should be a link at the bottom of your wiki
called Mobile view. Click it and you’ll see Minerva! On a phone,
MobileFrontend will automatically serve it but you can force your
default theme by clicking Desktop view in the same location.

Discussion pages 
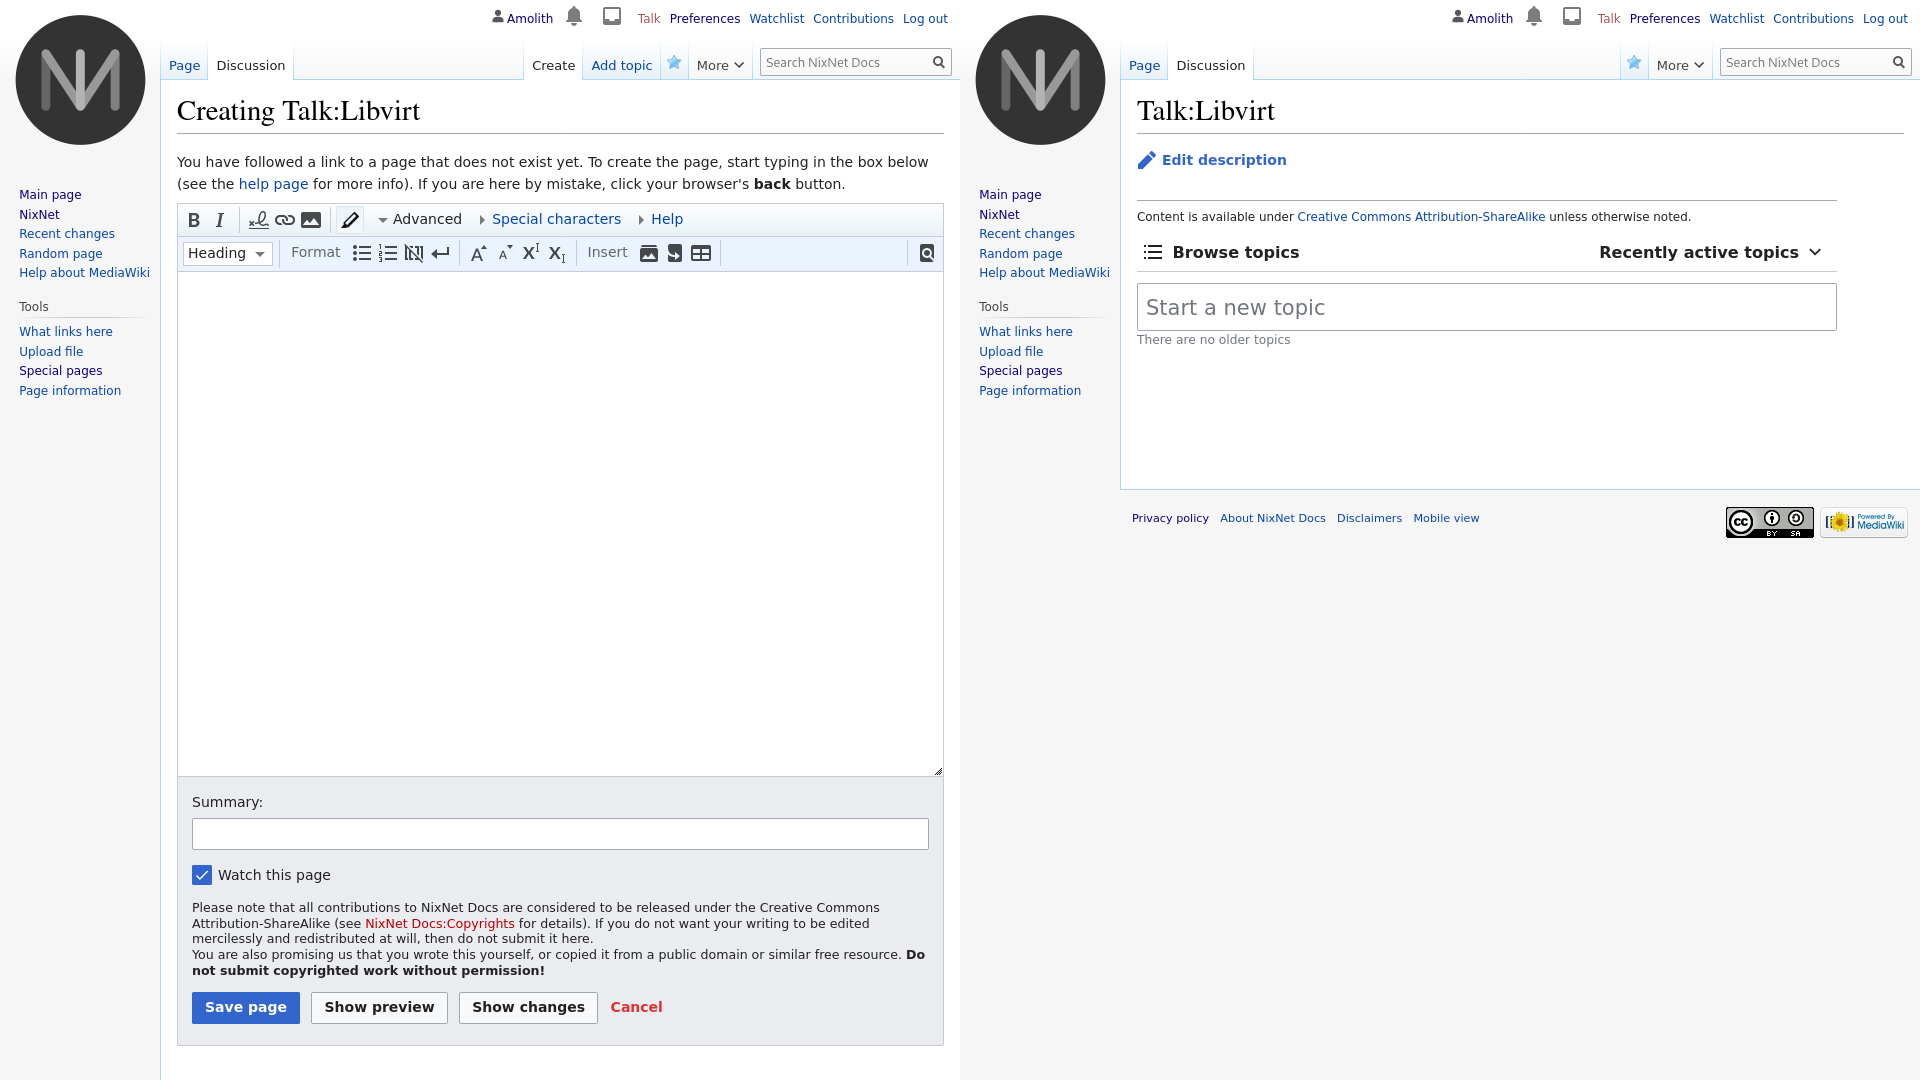
The default discussion page for MediaWiki works but, unless you’re already used to it, it can be quite odd for new people. That’s where the StructuredDiscussions extension comes in. Here’s a comparison of before and after enabling it.

As I said, the left works but most people wouldn’t know what to do when
given the default MediaWiki editor and it raises the barrier for entry.
The right is much more user-friendly and works exactly how one would
expect. StructuredDiscussions does have a few dependencies but they’re
easy to add. Echo is
for notifications and the others are included by default. After
installing
it,
and
StructuredDiscussions,
add the following lines to your LocalSettings.php.
# With the rest of your extensions
wfLoadExtension( 'Echo' );
wfLoadExtension( 'Flow' );
Running the following commands is necessary because MediaWiki’s database
needs modification to support the extension. General talk pages are
--ns=1 and User:Talk pages are --ns=3. If you only want Structured
Discussions enabled for one of them, only run that one. I personally
recommend doing it for all.
php maintenance/populateContentModel.php --wiki=somewiki --ns=1 --table=revision
php maintenance/populateContentModel.php --wiki=somewiki --ns=1 --table=archive
php maintenance/populateContentModel.php --wiki=somewiki --ns=1 --table=page

php maintenance/populateContentModel.php --wiki=somewiki --ns=3 --table=revision
php maintenance/populateContentModel.php --wiki=somewiki --ns=3 --table=archive
php maintenance/populateContentModel.php --wiki=somewiki --ns=3 --table=page
After that, add these to actually enable the extension. To temporarily disable it, you can comment them out but I don’t know how that will affect talk pages that already exist.
# Flow (discussions) configuration
$wgNamespaceContentModels[NS_TALK] = 'flow-board';
$wgNamespaceContentModels[NS_USER_TALK] = 'flow-board';
Subpages 
One of the features I’ll be making heavy use of for my Privacy
Policies and
Terms of
Service pages
is Subpages. This allows
you to create pages entitled Parent/Child and the child automatically
links back to the parent at the top. This can be seen in
Mozilla and Arch
Linux’s wikis
right under the header and in mine as
well. Enabling it is quite
simple; just add the following line to your config.
## Enable subpages for all namespaces
$wgNamespacesWithSubpages[NS_MAIN] = true;
Syntax highlighting 
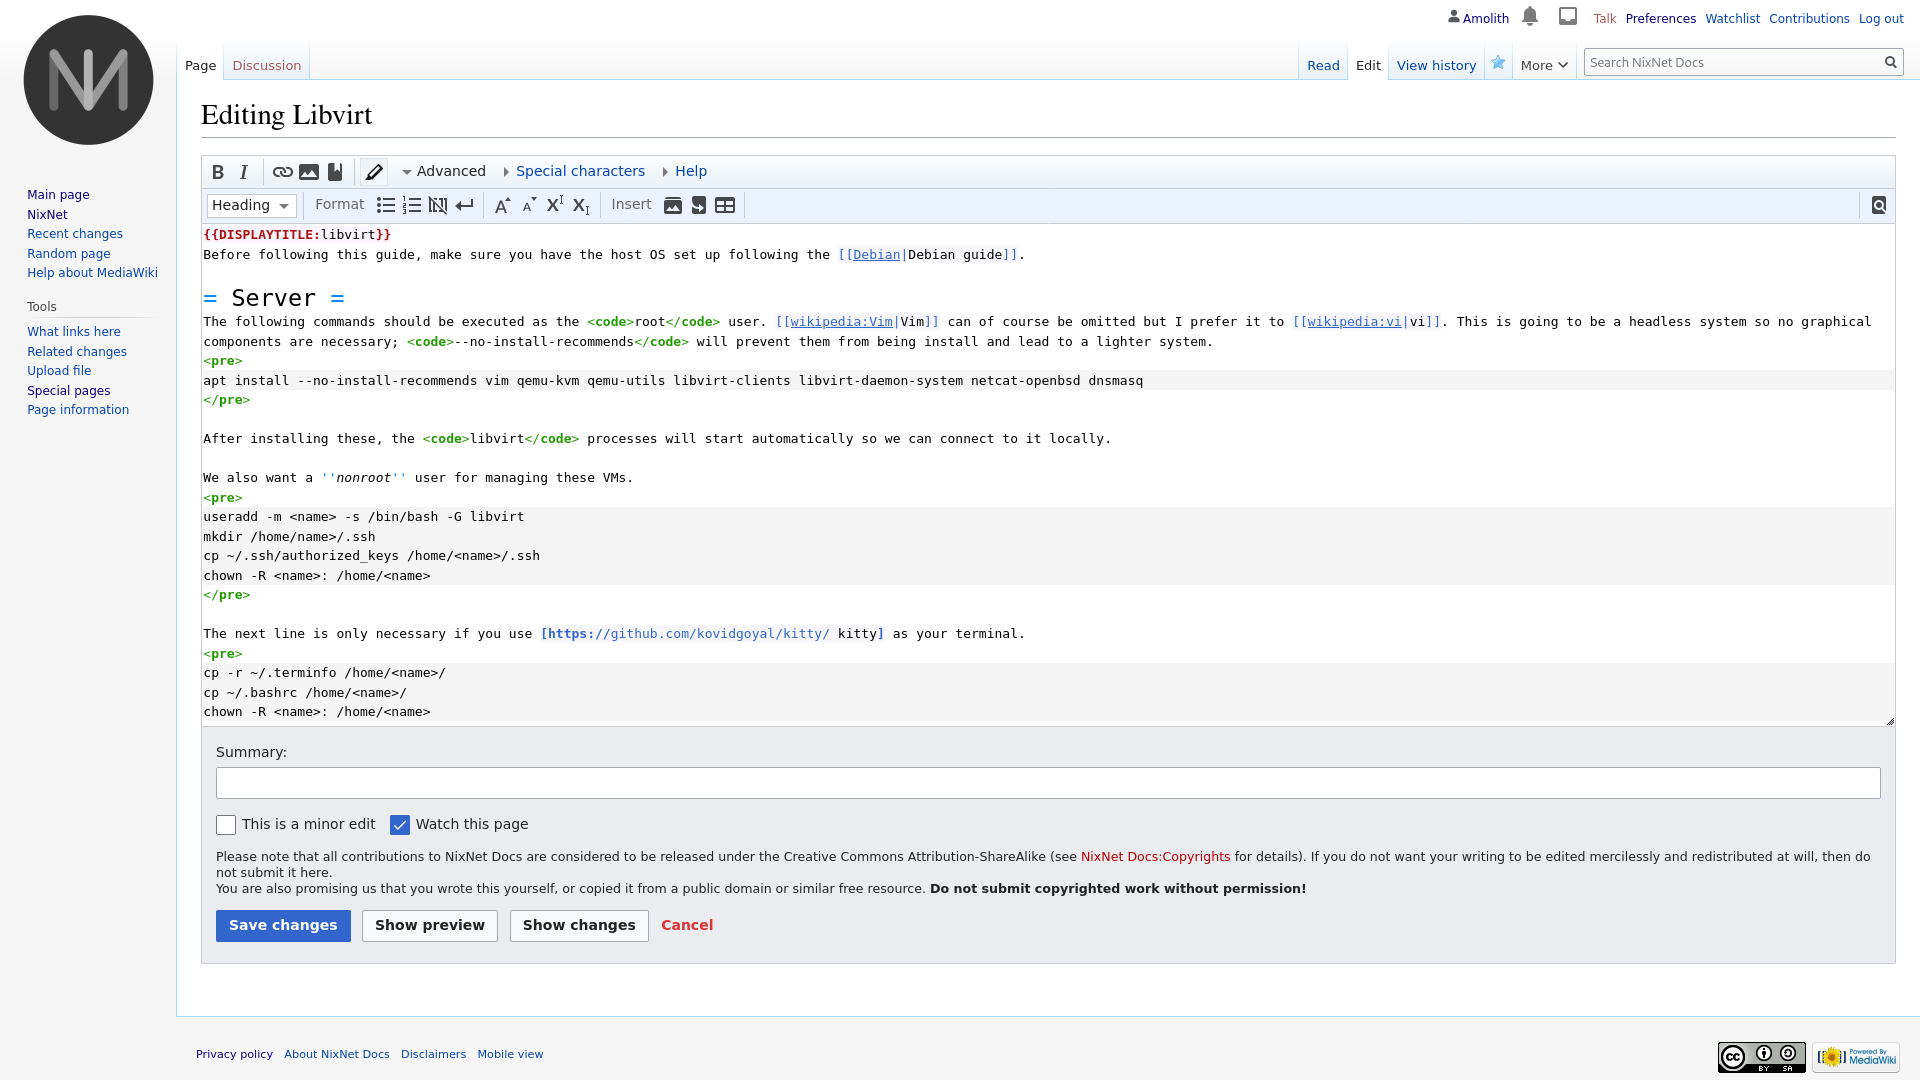
The final configuration change I’ve made (so far) has been to enable syntax highlighting in the default editor with CodeMirror. After installing it, add these lines to your config and you’re done!
# Place with the other extensions as always
wfLoadExtension( 'CodeMirror' );
# Enables it by default but allows users to disable it
$wgDefaultUserOptions['usecodemirror'] = 1;

Editing in Vim 
The final tip I have is that you can edit pretty much any MediaWiki instance in Vim, including Wikipedia itself, with a simple plugin. The only drawback I’ve found is that, unless you store your password in your config, you’ll have to enter it every time you close and reopen Vim. You can also give Vim Wikitext syntax highlighting for creating MediaWiki pages when offline. A few days ago, my wiki was completely offline while taking a disk image backup but I still wrote the majority of the libvirt and Debian pages while I waited and the highlighting was really nice.
This was posted as part of #100DaysToOffload, an awesome idea (dead link to fedi post) from Kev Quirk. If you want to participate, just write something every day for 100 days and post a link on social media with the hashtag!
-
If you’re having issues, feel free to contact me and I’ll help where I can. ↩︎
This is a self-hosted Commento server that integrates with Akismet for spam filtration. Comments that make it through are still subject to moderator (me) approval before they're displayed publicly.